Engineering Changes
Overview
Engineering Changes (EC), sometimes referred to as ECRs (Engineering Change Requests) enable Jakamo companies to share and manage engineering and design changes transparently and promptly in their whole supply chains, as well as internally. ECs typically consist of different tasks assigned to proper parties. Engineering Changes can be used merely via the Jakamo web user interface.
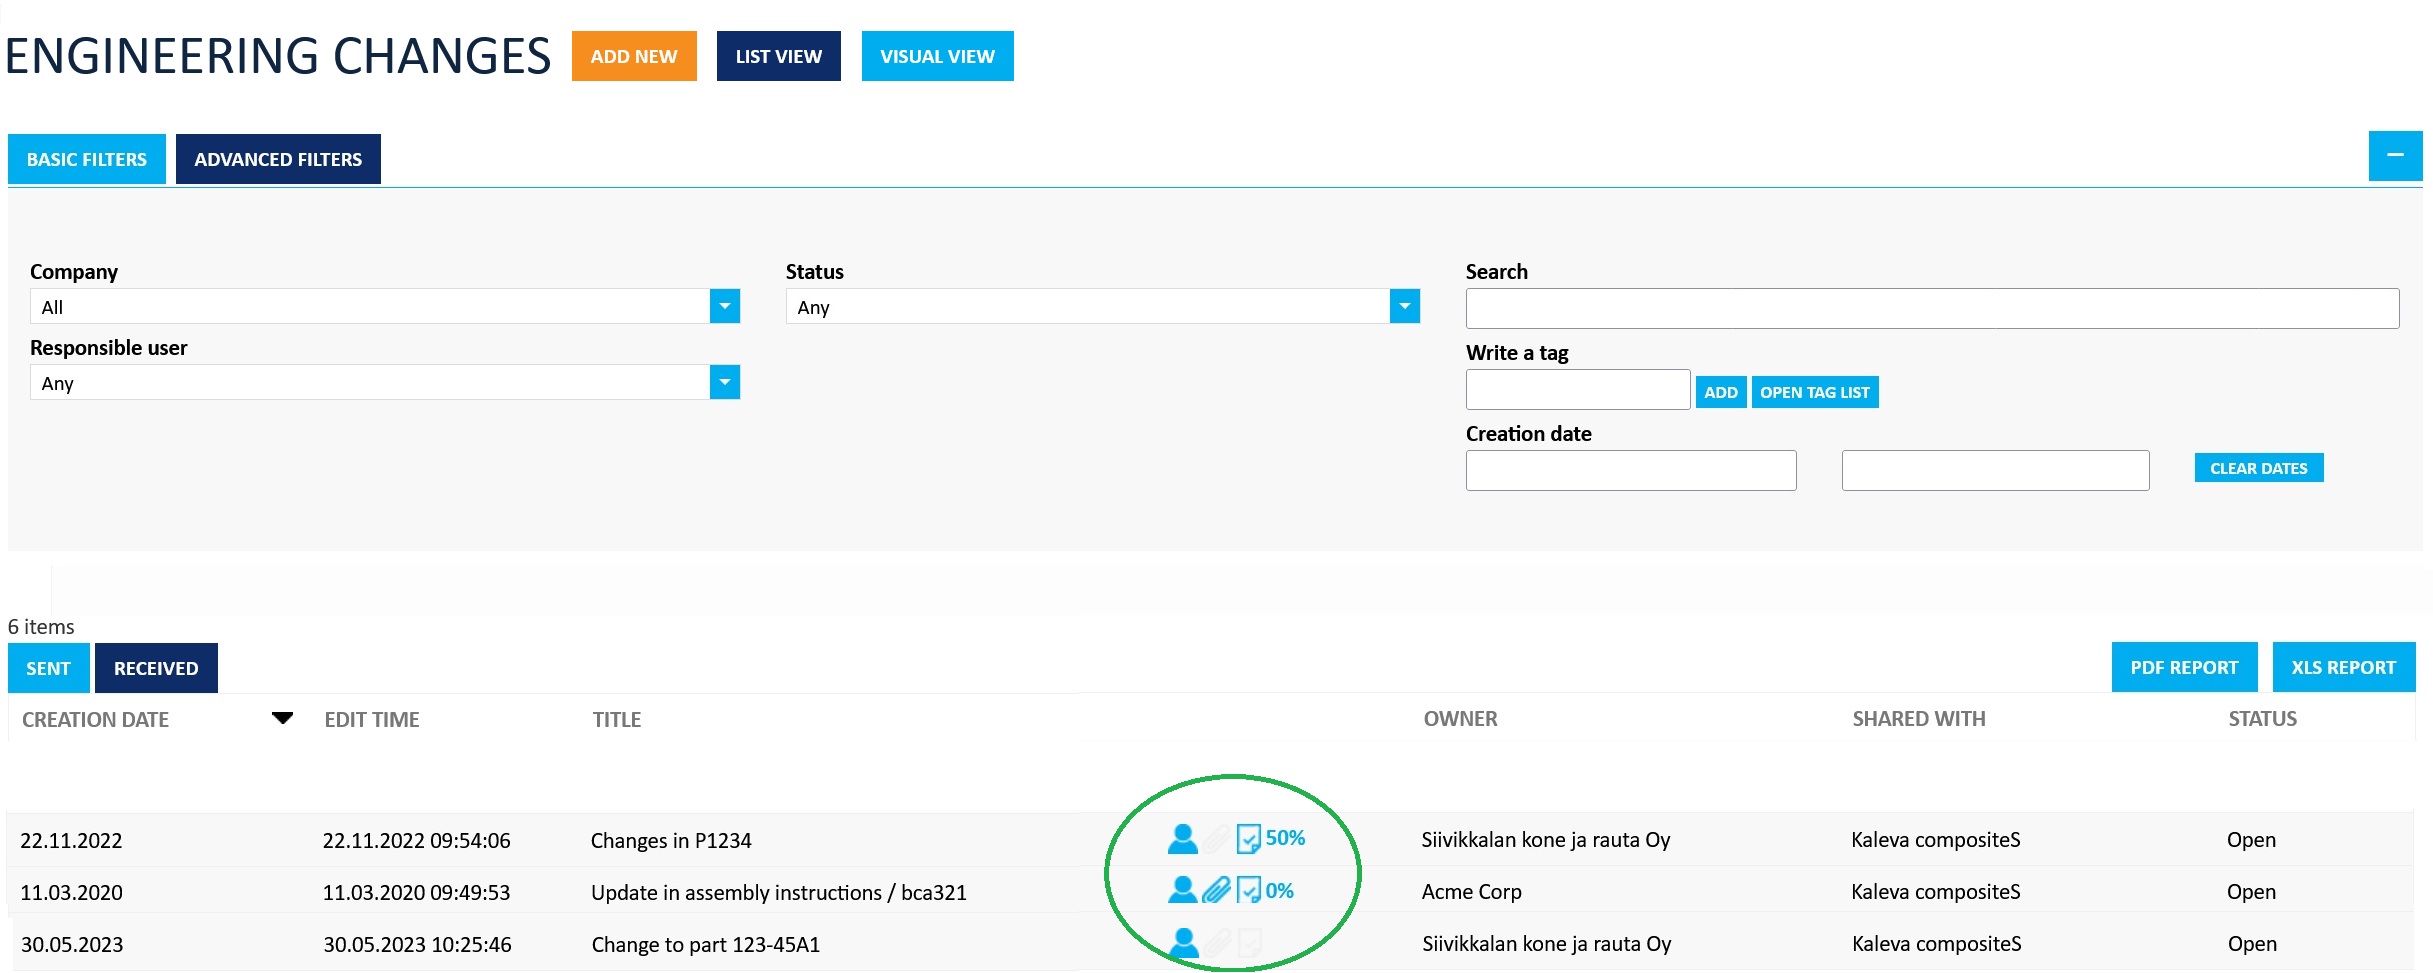
Sent and received ECs can be examined in the list view. Creation date, time for latest edit, and title are shown first for each EC. Turquoise symbols (circled with green) indicate whether the EC in hand has responsible users (person figure) or files attached (paper clip). The turquoise percentage indicates which portion of tasks assigned to the EC has already been completed.
1. Creating a new Engineering Change
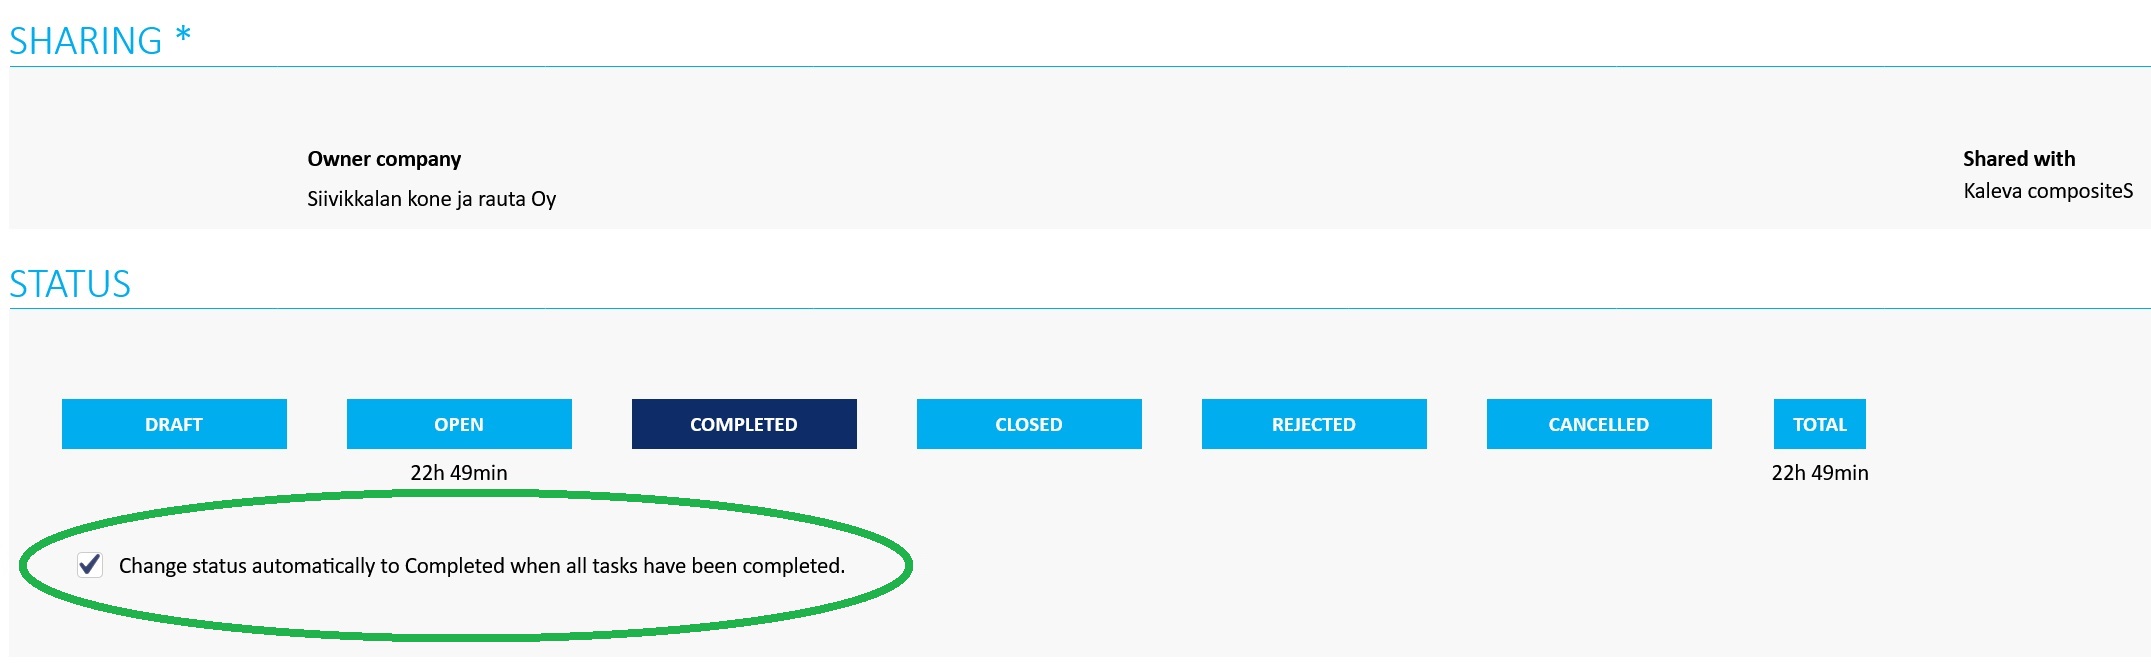
A new EC can be created by hitting the orange ADD NEW icon on the top of the list view. First, choose internally sharing or sharing the EC with your partnership companies in Jakamo. If you wish the status of the EC to change automatically to completed after all tasks are done, check the tickbox under the Status header. Fill in basic info, possibly involve users from either your company or the company you are sharing the EC with, and add tasks.

After filling in the basic information, tasks can be added. Tasks are very useful, especially in ECR's that have identifiable steps involving cooperation between customer and supplier. There are no limits in the quantity of tasks, one or two as well as twenty tasks can be added.
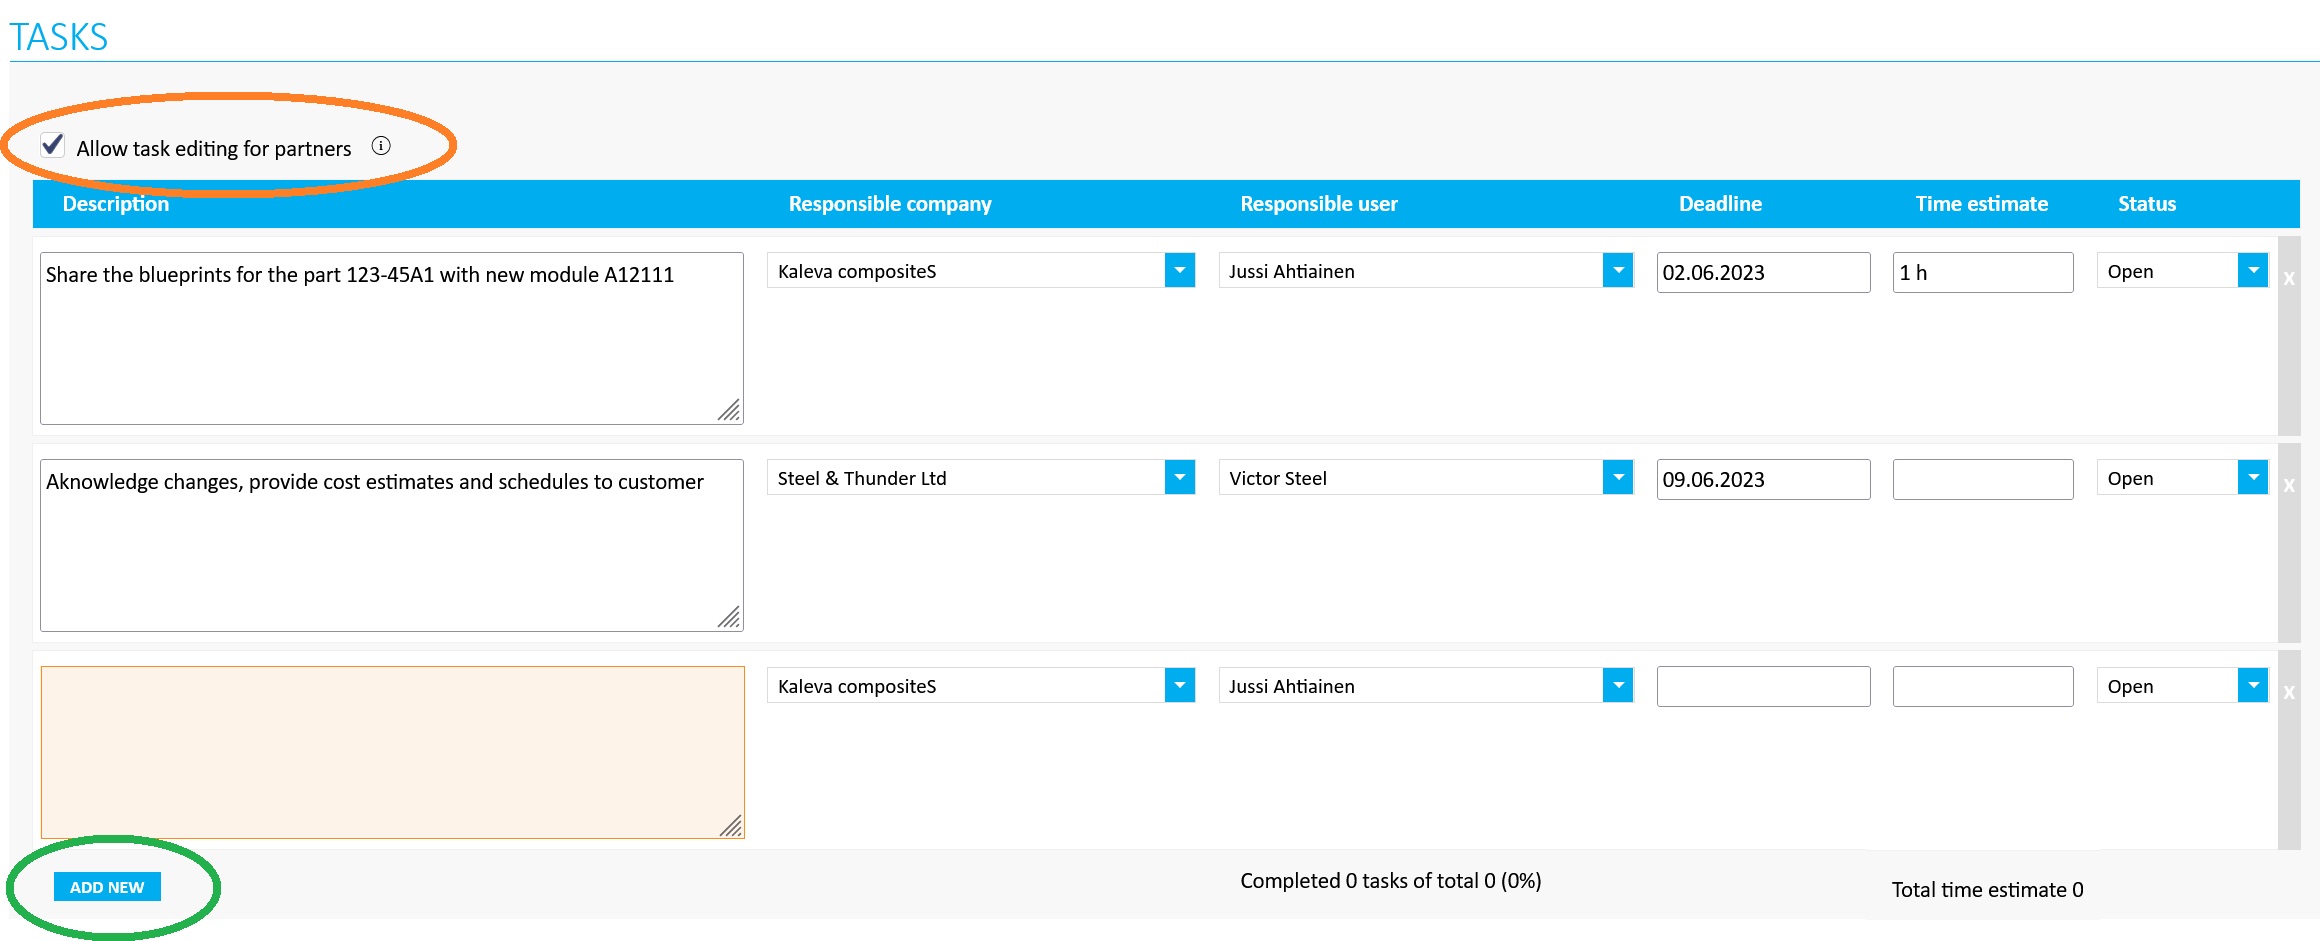
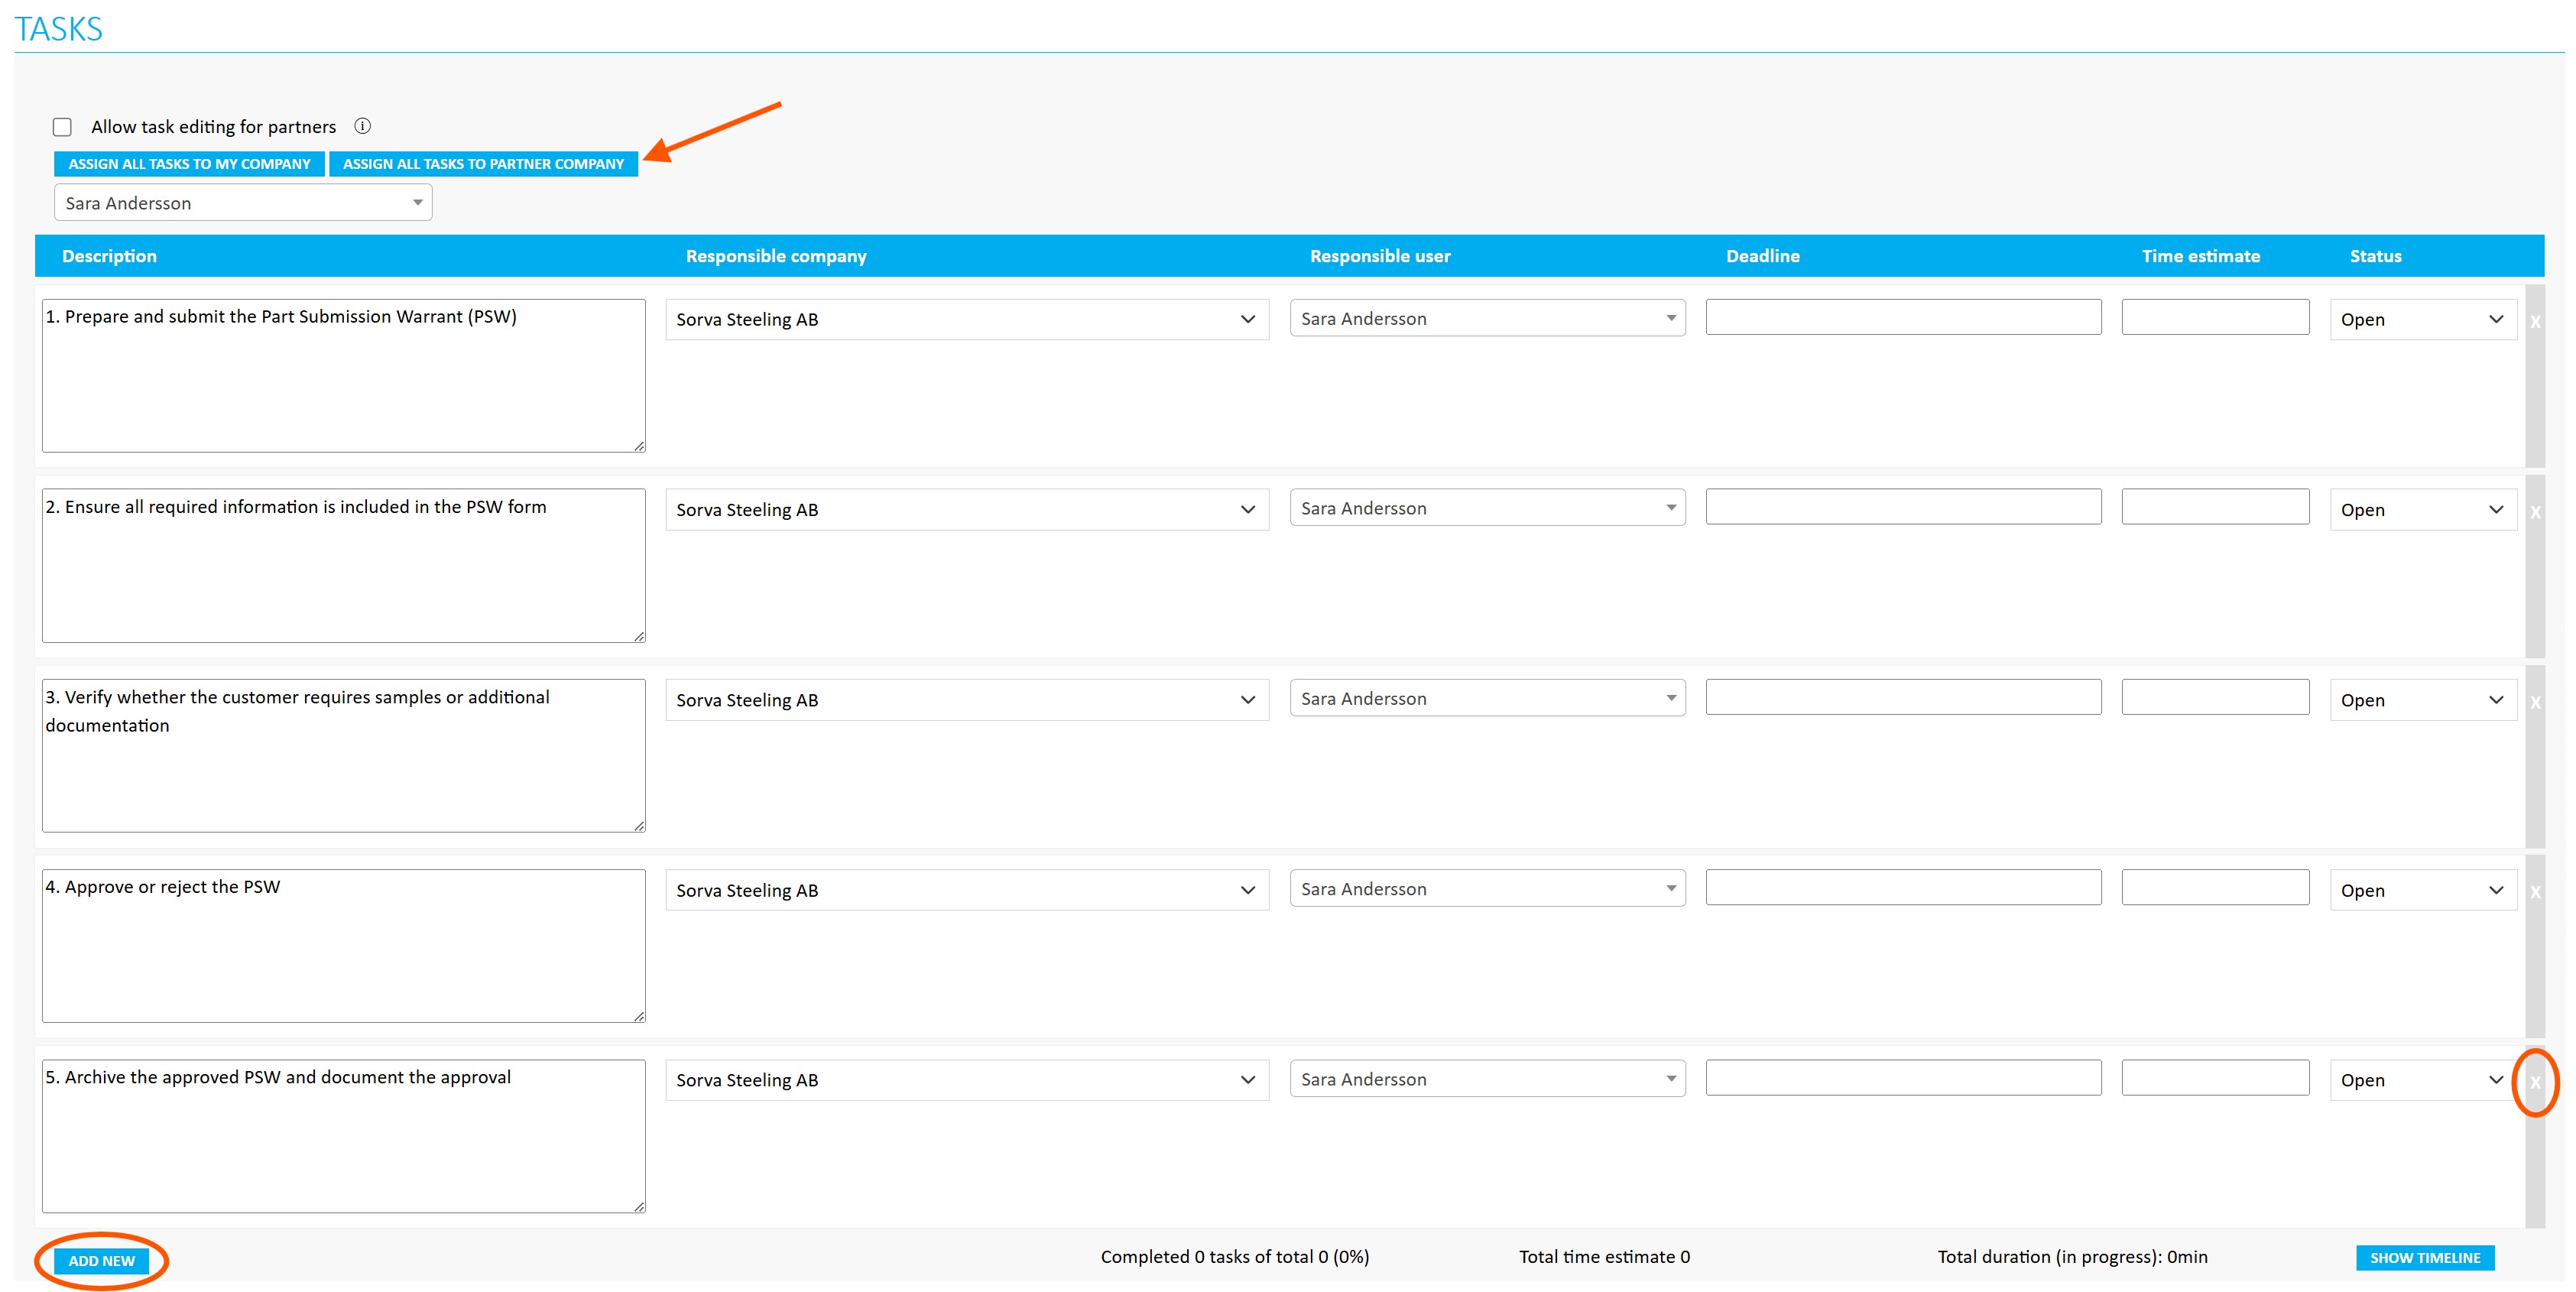
In most cases, it is the best practice to check the Allow task editing for partners tickbox, circled with orange in the picture below. When the tickbox is checked, users from the author and responsible company can for instance change the status of the task to In progress, Ready for review, or Completed, or update the responsible user of the task. By doing so, parties from both companies can always see the current status of the EC and its tasks.
A new task can be added by hitting the blue ADD NEW icon. Each task is given a description of the task, and the responsible company and possibly responsible user need to be chosen for parties to know who needs to take action. Deadlines can be added as well. If deadline is set to the task, responsible user is reminded of that open task before it's deadline automatically.
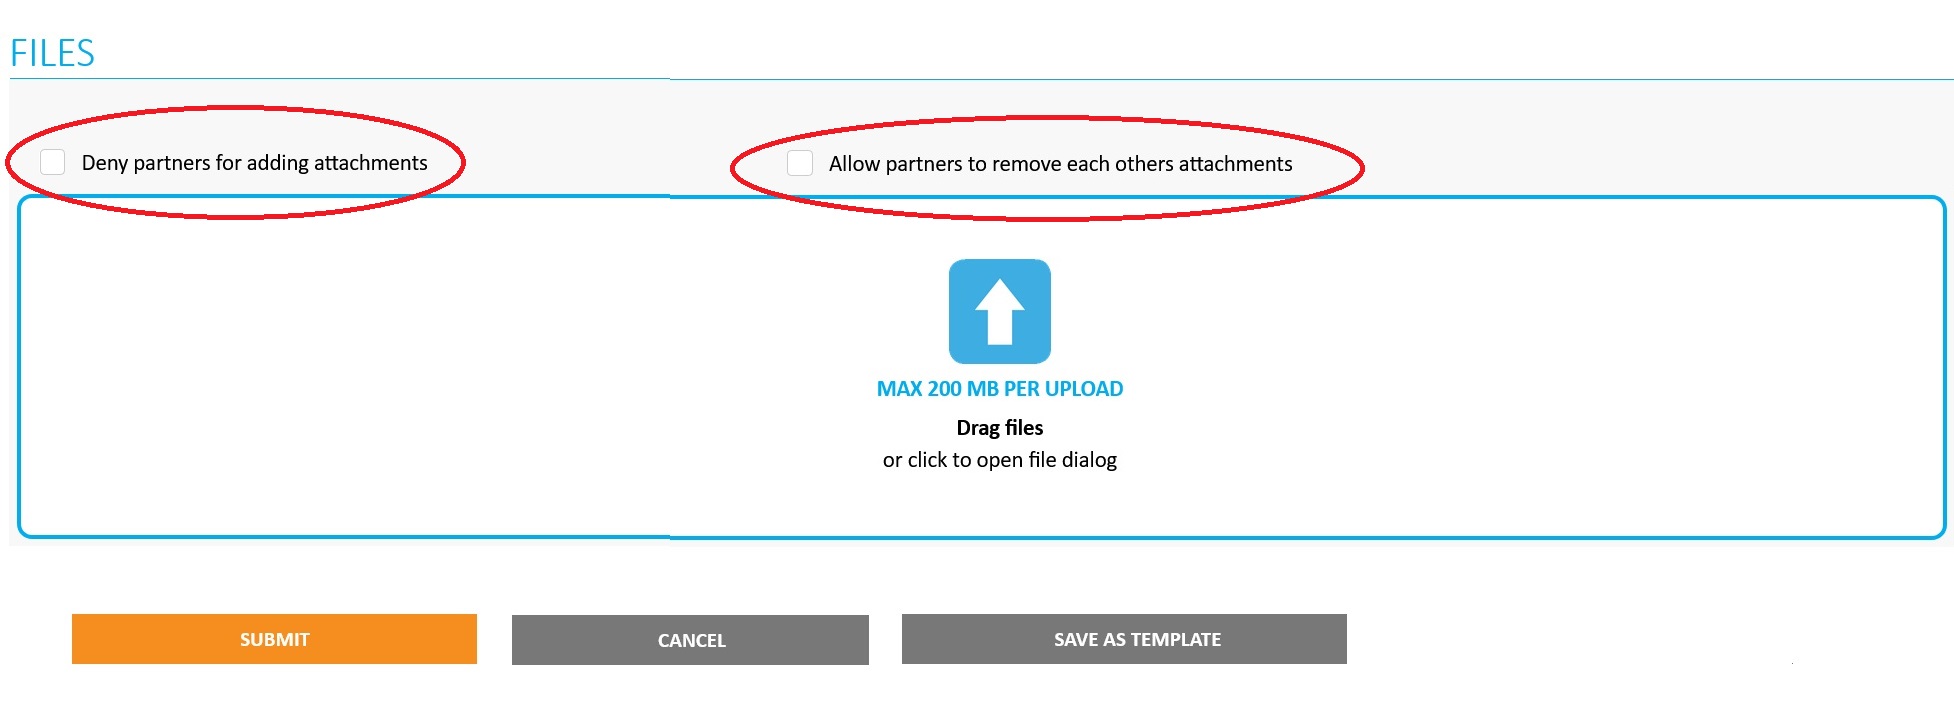
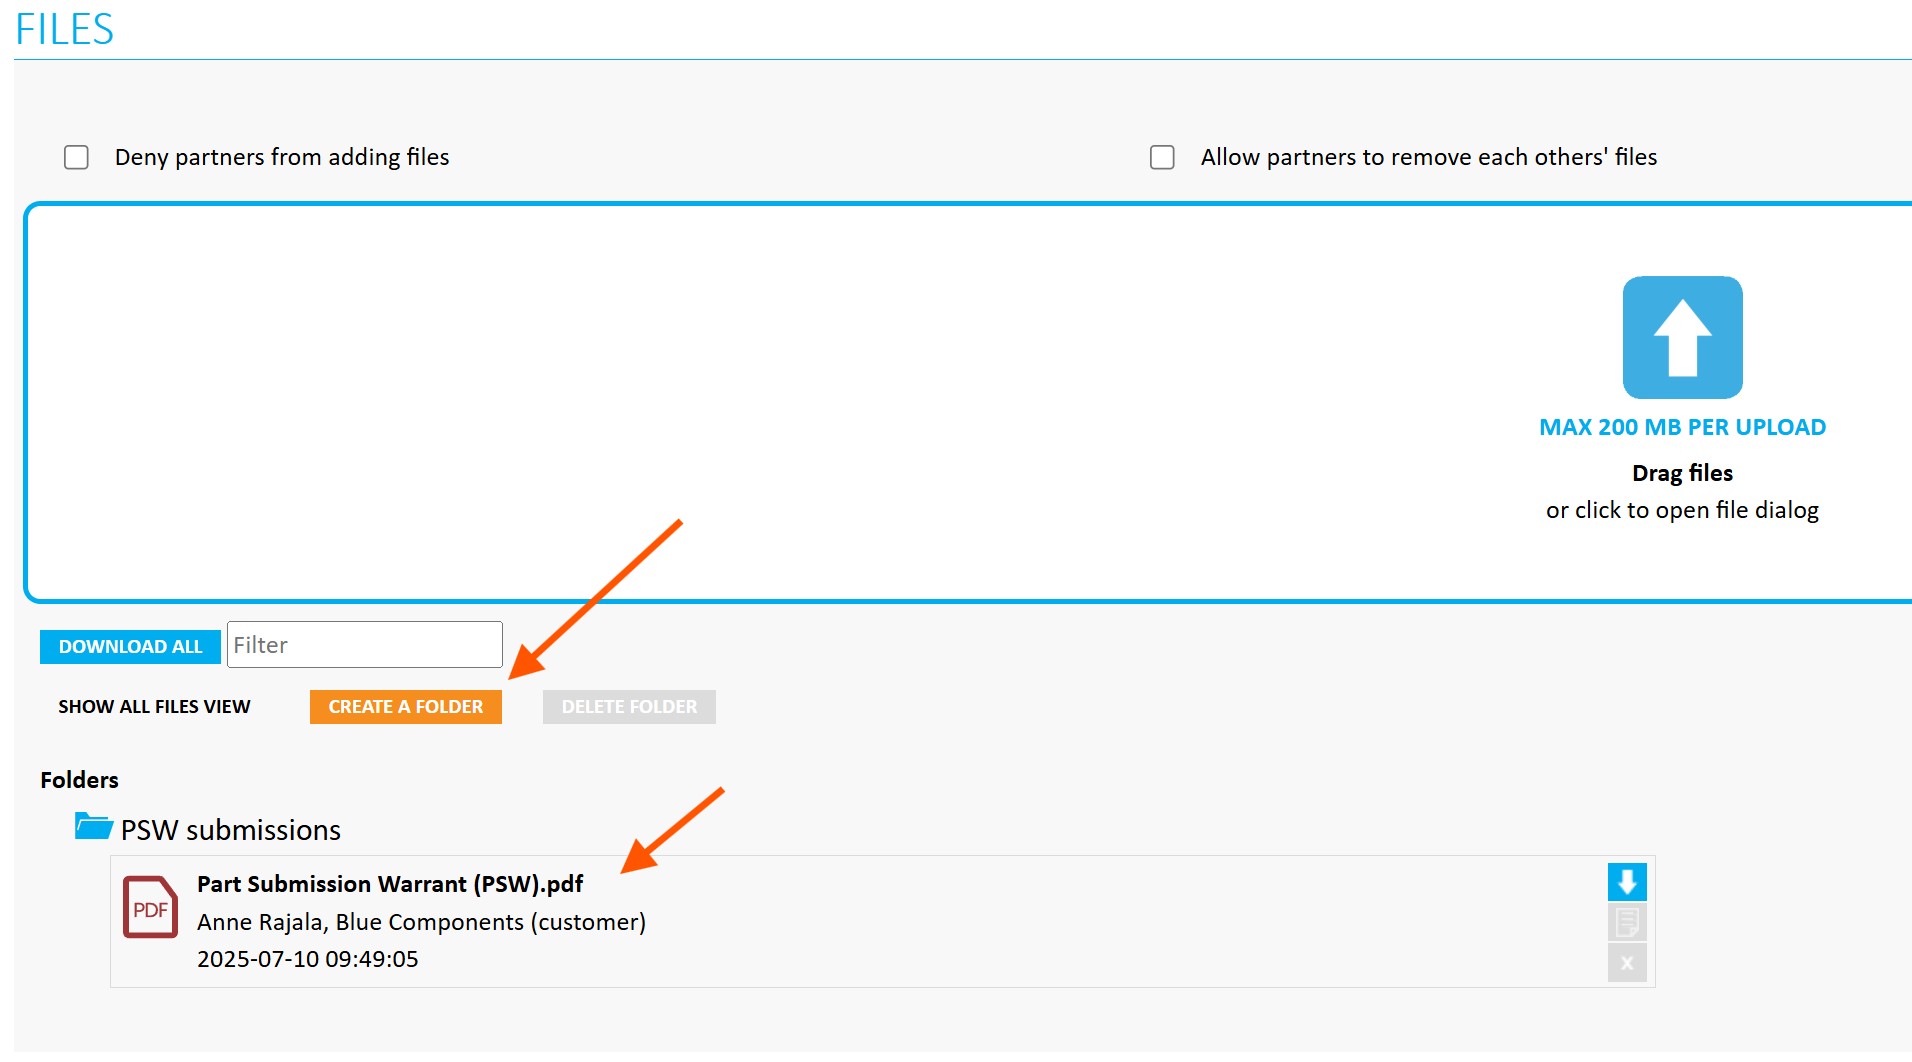
Blueprints or other needed files can be attached to the FILES section. Learn more about the attachements from files guide. Users in the owner company for the EC can deny partners from adding attachments as well as allow the users in partner companies to remove attached files. Usually, it is more suitable if neither of these tickboxes isn't checked.
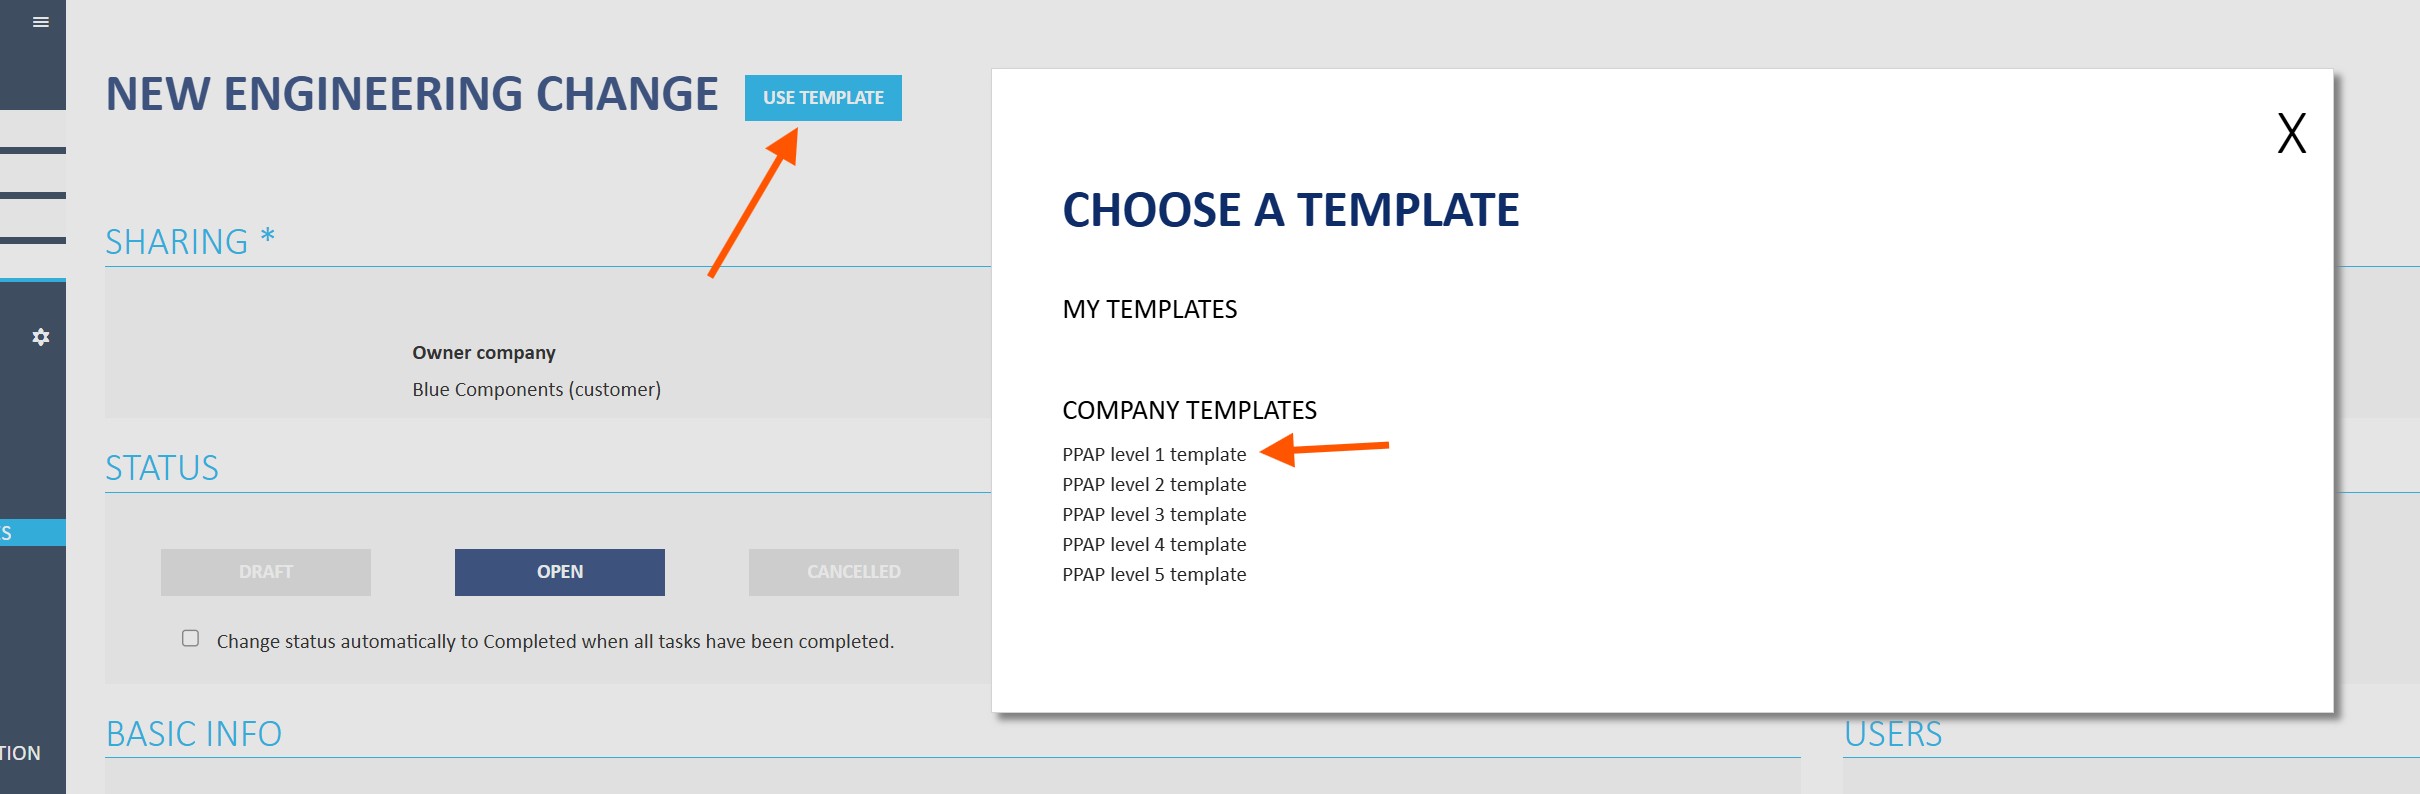
Files can be attached by using drag & drop, or by file uploading dialog that opens when hitting the file upload window at any point. After all necessary fields have been completed, EC can be shared and saved with the SUBMIT icon. EC can also be saved as a template, depending on the Jakamo plan your company has in use. You can learn more about the templates from here.
2. Editing and filling existing Engineering Changes
Users in the owner company for the EC can edit all fields in the existing EC, users in partner companies can edit fields under the USERS header, and if the owner company has allowed, all fields in the task list. Both parties can always add comments, notes, or questions to the Discussion window in the bottom part of the view, as well as files above it.
- If your company is using a premium or enterprise plan in Jakamo, you can also discuss about the EC (as well as other Jakamo items, such as Orders and Claims) internally. This can be done by hitting the blue
INTERNALicon in the top right corner of the EC view. Attachments added and messages posted in the Internal view are only shown to users from your company. Be careful on choosing which content is public or internal! Internal files and discussion view have a header that indicates if you are in internal discussions.

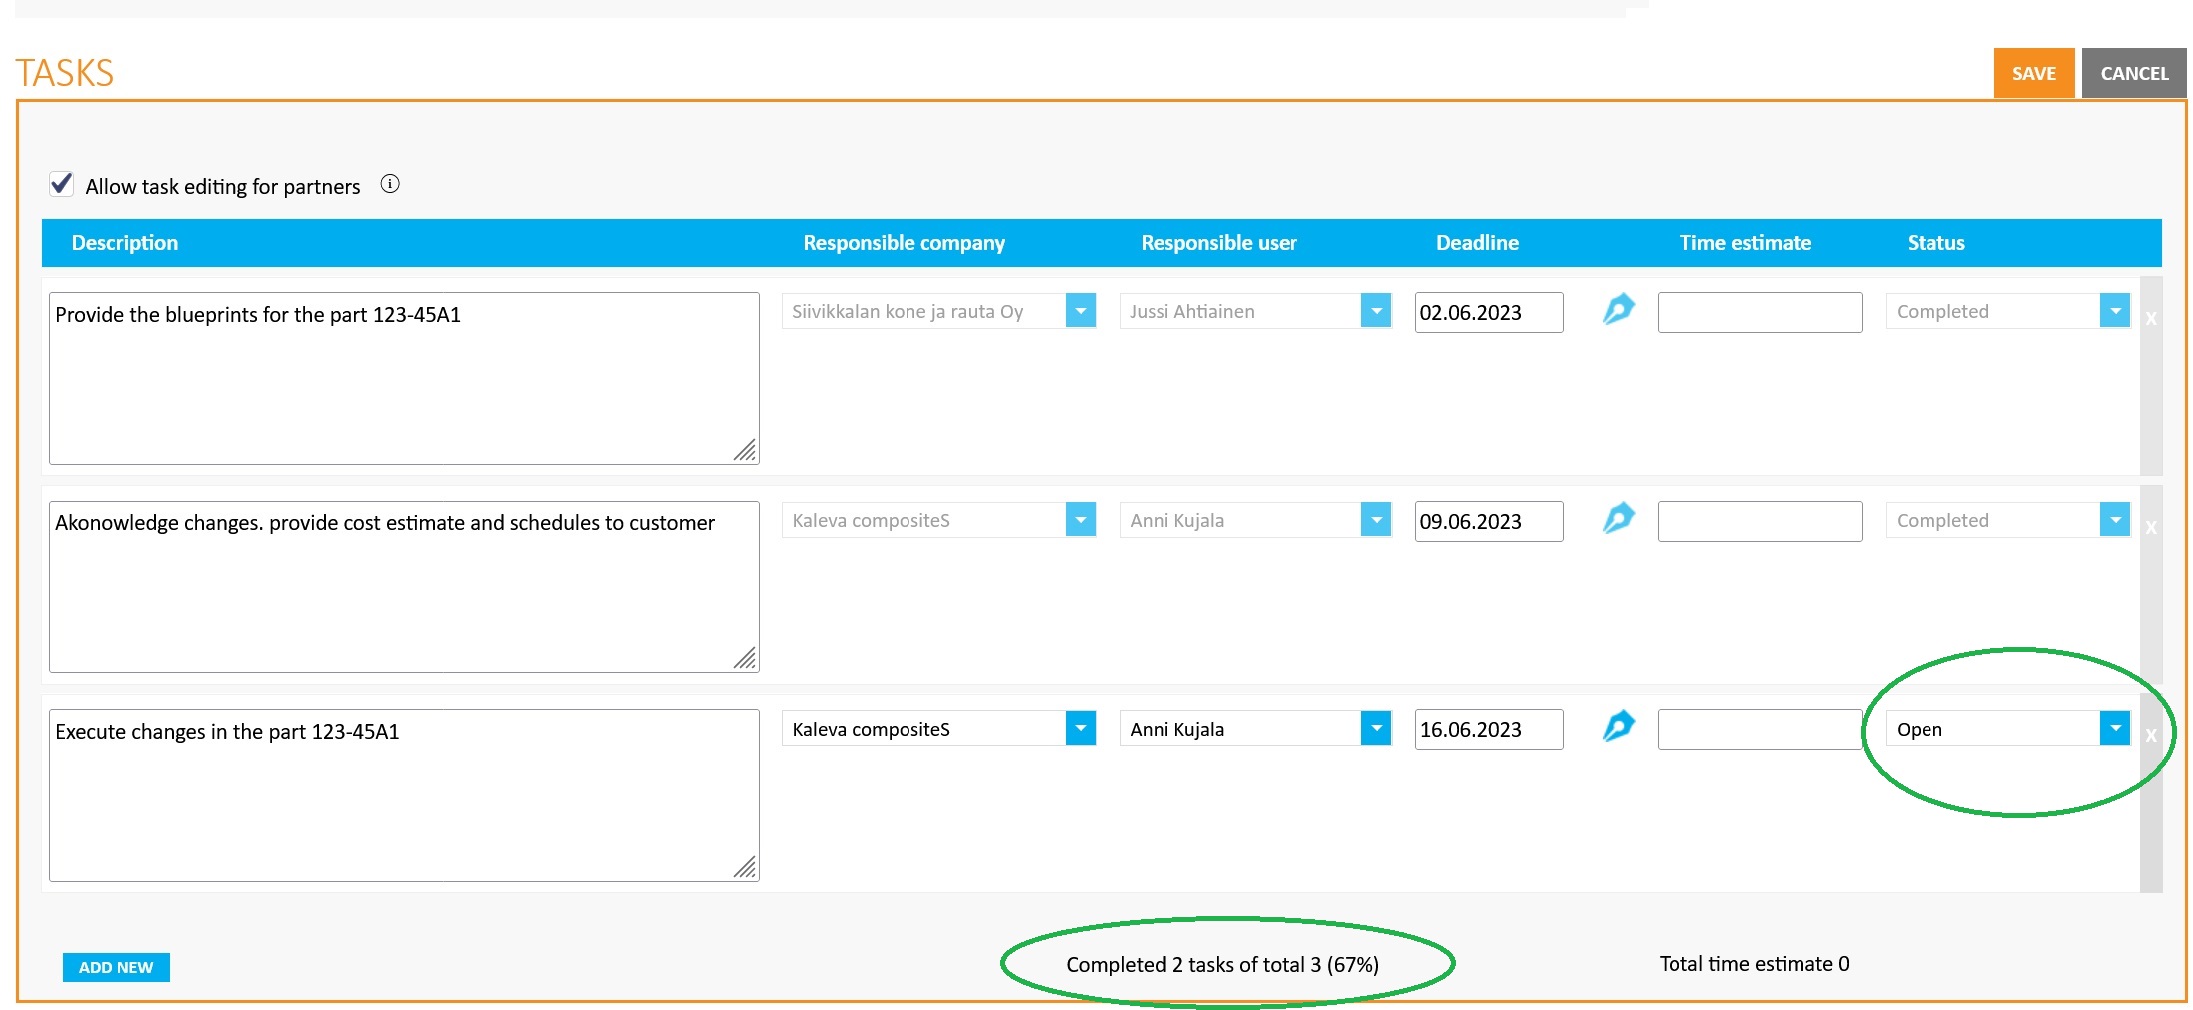
One of the most typical use cases within EC is setting the statuses for different tasks. If the owner company has allowed it to partner companies, both parties can edit the statuses by hitting the EDIT icon above the task list. The current status can be set from the dropdown menu on the right. After the status is set, changes can be saved with SAVE icon.
The completion portion for the EC is presented at the bottom of the task list. Counter calculates only the portion of the tasks with the status Completed, Approved, or Cancelled from all tasks added. It does not consider for instance time estimates.
When all tasks have been set to Completed status, the owner company can change the header level status for the EC to Completed as well. The easier way is to check the tickbox Change status automatically to Completed when all tasks have been completed. After checking the box, the Completed status is set automatically. Time under different statuses shows the time EC has had that status.
3. Cancelling existing Engineering Change
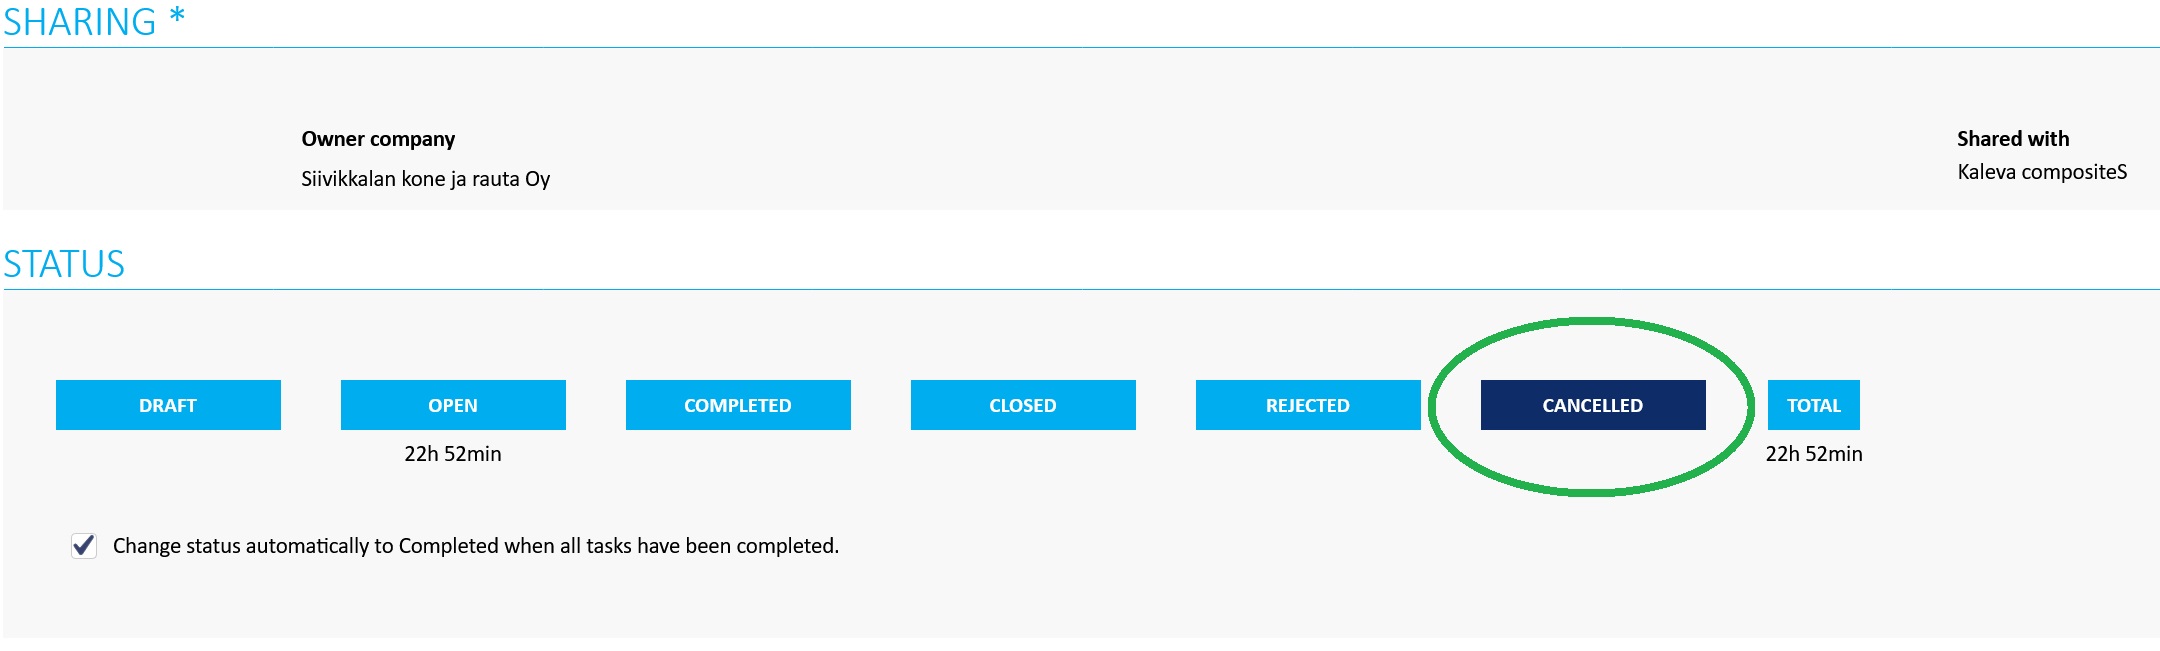
The owner company of the EC can cancel the existing EC by setting the header level status for the EC to CANCELLED Reminders about the possible tasks are not sent anymore, but the EC stays in the list view.
4. PPAP process with Engineering Changes App
PPAP process is managed in Jakamo Engineering Changes application using pre-defined templates with tasks relevant for each submission level.
To get started:
- Create a Company Template for each PPAP submission level (1-5) or for any custom combination your organization uses.
- Begin with Level 3, which includes a comprehensive set of 18 individual tasks.
- Create all 18 tasks from level 3 as a separate tasks to the template
- Once the Level 3 template is ready, use it as a foundation to create other templates by selecting only the relevant subset of tasks for Levels 1, 2, 4, or 5.
Copy these tasks to make your start more easier:
| # | PPAP Level 3 – Full Documentation - Tasks | Responsible Party |
|---|---|---|
| 1 | Provide Design Records | Buyer |
| 2 | Submit Authorized Engineering Change Documents | Buyer |
| 3 | Provide Customer Engineering Approval (if required) | Buyer |
| 4 | Submit Design Failure Mode and Effects Analysis (DFMEA) | Supplier |
| 5 | Submit Process Failure Mode and Effects Analysis (PFMEA) | Supplier |
| 6 | Submit Process Flow Diagram | Supplier |
| 7 | Submit Control Plan | Supplier |
| 8 | Provide Measurement System Analysis (MSA) Studies | Supplier |
| 9 | Submit Dimensional Results | Supplier |
| 10 | Provide Material / Performance Test Results | Supplier |
| 11 | Submit Initial Process Studies (e.g., Cp, Cpk) | Supplier |
| 12 | Provide Qualified Laboratory Documentation | Supplier |
| 13 | Submit Appearance Approval Report (AAR) (if applicable) | Supplier |
| 14 | Provide Sample Production Parts | Supplier |
| 15 | Submit Master Sample | Supplier |
| 16 | Provide Checking Aids Documentation | Supplier |
| 17 | Include Records of Compliance with Customer-Specific Requirements | Supplier |
| 18 | Submit Part Submission Warrant (PSW) | Supplier |
Tips! 💡
- You can create common template to utilize one with all your suppliers, or you can design supplier-spesific templates with ready-assigned tasks for different responsible persons. It is up to you and your PPAP with your suppliers.
- Create folders for files to making submitting files clear for supplier
- Utilize task timeline and duration for In progress status for each task to evaluate the lead time of task and entire PPAP
Example: Follow these steps to efficiently create and manage a new PPAP item with your suppliers:
- Start with a Template: when creating a new PPAP item, always select one of your predefined company templates as the starting point to avoid creating any tasks manually.
- Choose the Supplier: Select which supplier(s) you want to share the PPAP item with from the Sharing section.
- Fill in Basic Information: provide the mandatory details such as title of the PPAP and description of the item or process
- Review and Customize Task: go through all the tasks included in the template. Add new tasks or remove unnecessary ones, and assign responsibilities for each task to the appropriate company and person responsible.
- Attach Documentation: ensure all required files and documents are uploaded to the Files section within appropriate folders.
- Submit the PPAP: Once everything is complete, submit the PPAP to initiate the process with your supplier.
Didn't you find what you were looking for? Send an email to Jakamo support (support@thejakamo.com) and we will help you.